.png)
From Snacks to Desserts: My Honest Review of Japanese Konbini Hacks
- Dec 4, 2025
- 12 min read
When people talk about Japan, convenience stores are always one of the first things that come up, and for good reason. They offer a huge variety of delicious food and drinks you won’t find in many other countries. Over the years, people have even come up with fun convenience-store “food hacks” and shared them online, making the konbini experience even more enjoyable and unique.
While browsing the internet—mostly TikTok—I discovered all kinds of hacks: snacks, meals, drinks, and even desserts. Some didn’t look the best, but most of them seemed surprisingly interesting. The more I watched, the more curious I became. I wanted to know how they actually tasted and whether the creators were being honest when they said the hacks were good.
So for this blog, I’ll be trying and reviewing several food hacks from Japanese convenience stores myself, but since there are so many out there, I decided to pick three from each category: Snacks, Meal Sets, Drinks, and Desserts. I’ll be judging them based on appearance or taste, texture, and difficulty (to make).
SNACKS:
Egg and Chicken Sandwich
Ingredient (I used): Egg Sandwich + Famichiki red

After buying everything for this hack, I already had a feeling it would taste amazing because honestly, how could you go wrong with an egg sandwich and chicken? And just like I expected, the moment I took a bite, the softness of the bread hit first, and then all the flavors mixed together and burst in my mouth. My taste buds were basically celebrating with every bite.
The fluffy bread, the salty, crispy, slightly spicy chicken, and the creamy egg paste with just the right amount of seasoning…it all came together so perfectly that it felt like the ideal convenience-store snack. And yes, I know some of you are probably thinking, “Rose, a sandwich is not a snack. What are you saying?” But for me, it totally is, especially if you're sharing it with others during a break or eating it while watching a movie. It’s that kind of snack that fills you up in a satisfying way.
Summary:
Appearance: Just a normal-looking sandwich.
Texture: Soft, chewy, with a little crispiness.
Difficulty: Very easy and quick to assemble.
Overall Rating: ★★★★★
Egg Cookies Mochi
Ingredient (I used): Egg Cookies + Milk

For this hack, add a layer of egg cookies to a small bowl. You don’t need to use the whole pack, just enough to cover the bottom. Pour in a bit of milk, just enough so you can still see the tops of the cookies, then pop it into the microwave for two minutes. When it was done, the top looked nicely toasted while the bottom was noticeably softer.
My first bite was crunchy, but the chewiness followed right after. At first, I was excited since I grew up eating these cookies, but baked with milk, the flavor turned out pretty bland. As I kept chewing, it started tasting more like plain bread. And once it cooled, the texture became almost plastic-like: tough, artificial, and really difficult to chew.
Honestly, I didn’t enjoy it. Maybe I added too much milk, but the end result didn’t look or taste appetizing at all. Still, it was a fun little experiment to try!
Summary:
Appearance: Toasted on top; firm and plastic-like on the bottom.
Texture: Crunchy at first, then chewy; becomes hard to chew once cooled.
Difficulty: Easy overall, though the lack of exact measurements made it a bit tricky.
Overall Rating: ★☆☆☆☆
Mashed Potato
Ingredient (I used): Cheese Stick (blue color) + Jyagarico (Original Salad Flavor)

For this hack, start by boiling some water. While you wait, open the Jyagarico cup and unwrap the cheese stick. Tear the cheese into thin strips and place them on top of the potatoes. Once the water is ready, pour it into the Jyagarico container until it reaches about halfway, then start mixing everything together until it turns into a mashed-potato-like consistency. I won’t lie, this part of the process of this hack is a bit tedious, especially in the beginning, but the end result is totally worth it.
I actually learned this hack from my Japanese friend, and the first time I tried it, I instantly fell in love. The combination of cheesiness and saltiness is just so good. Honestly, if you added a little gravy, I’m convinced it would taste exactly like real mashed potatoes, maybe even better. This was my third time making it, and it was just as satisfying as the first. However, you do need to eat it right after making it, because if it sits for too long it dries out, and honestly, that was the only part I didn’t enjoy about this hack.
Summary:
Appearance: Mashed potatoes
Texture: Chewy and smooth, but can be rough.
Difficulty: A bit tedious, especially with chopsticks (I recommend using a fork!).
Overall Rating: ★★★★☆
MEAL SET
Meal 1
Ingredient (I used): Rice Pack + Soft-Boiled Egg + Seasoned Stewed Pork + Kimchi

Microwave the rice pack and the seasoned stewed pork according to the instructions, and make sure to open the rice pack up to the red line before heating. Once everything is warmed, layer them in a bowl in this order: rice, pork, and egg, then place the kimchi on the side.
Before even taking a bite, the pork looked incredibly soft and smelled amazing. For some reason, it reminded me of adobo, so I was already excited. The egg peeled nicely, and the kimchi…well, it smelled exactly like kimchi.
When I finally tasted it, the pork fat melted in my mouth, and the meat was very tender; it separated effortlessly with just my spoon. The egg was a bit bland, but that was on me for not adding salt, and as for the kimchi, it tasted great as usual. Then I tried eating everything together in one bite. The result? Heavenly! The spiciness and crunch of the kimchi mixed with the salty, savory pork was such a good combination. But the egg didn’t really stand out, and honestly, the meal would’ve been perfectly fine without it, but overall, it was absolutely delicious, and I enjoyed every single bite!
Summary:
Appearance: Savory goodness
Texture: Tender with a bit of crunch (thanks to the kimchi)
Difficulty: Very easy! The egg peeled smoothly, and everything else just needed microwaving and assembling.
Overall Rating: ★★★★★
Meal 2
Ingredient (I used): Big Tonkotsu Cup Ramen + Poached Egg + Raw Pork

First, prepare the cup noodles according to the package instructions. This particular large tonkotsu cup noodle has a lot of included ingredients, which also means it comes with a lot of steps, and honestly, it will be kind of annoying when you’re hungry and you just want to eat. Then, after following everything the package told me to do, I added the raw pork (which in this case was dried ham), poured in the hot water, and waited three minutes for the noodles to soften and the pork to cook. The cup even came with its own cooked meat, though only one.
At first, I wasn’t sure if the pork I bought was the right kind for this hack, but once I placed it into the boiling water with the noodles, it actually cooked perfectly, so all was good. The flavor of the pork it came with was salty—maybe a little too salty for my taste—and the broth was supposed to have a bit of spice, but I honestly didn’t taste any. Maybe that’s because I love overly spicy food, and my tongue is just used to it.
However, the broth itself had a nice, balanced saltiness, and the pork I added absorbed the flavor well, and surprisingly, I ended up really liking it! But here’s one important tip: don’t leave the noodles soaking in the hot water for too long, like I did, because they will turn soggy. Even so, it still filled me up, and I enjoyed my meal.
Summary:
Appearance: Savory and appetizing
Texture: Pork was slightly dry; noodles turned soggy (my fault for leaving them too long).
Difficulty: Takes a bit of time and can be tedious, especially if you can’t read Japanese and need to follow all the steps carefully.
Overall Rating: ★★★☆☆ (because of the soggy noodles and the overly salty pork).
Meal 3
Ingredient (I used): Onigiri + Ochazuke + Pickled Vegetables + Tamagoyaki

If you kept your onigiri in the fridge overnight like I did, start by microwaving it to soften it up. Once warm, transfer it to a bowl and crush it gently with a spoon. Sprinkle one pack of ochazuke seasoning over the rice, and, after preparing your hot water, pour it in until it rises slightly above the rice, or simply follow the package instructions. For this meal, I also grabbed a tamagoyaki, which was already cut into four pieces, so all I had to do was heat it briefly in the microwave. Honestly, this entire set was very easy to put together.
The tamagoyaki was slightly sweet, as it should be, and the onigiri had tuna inside, adding extra flavor that mixed nicely with the ochazuke. The tsukemono, however, might not be for everyone because the taste can be a bit hit-or-miss, and the pickled vegetables I bought weren’t exactly my favorite. Still, this set felt the closest to a typical Japanese home-style meal. It was filling but not overwhelmingly heavy, and I really enjoyed each bite… except for the pickles. I usually love pickled vegetables, but the one I chose just wasn’t for me. That said, it could be a fun and interesting experience for you to try!
Summary:
Appearance: A classic Japanese meal (minus the miso).
Texture: Crunchy pickles; soft and moist tamagoyaki; soupy, porridge-like rice (in a good way!).
Difficulty: Very easy, especially if you’ve made ochazuke before. Much less tedious than the second meal set.
Overall Rating: ★★★★☆ (mainly because of the pickled vegetables)
DRINKS
Digestion Drink
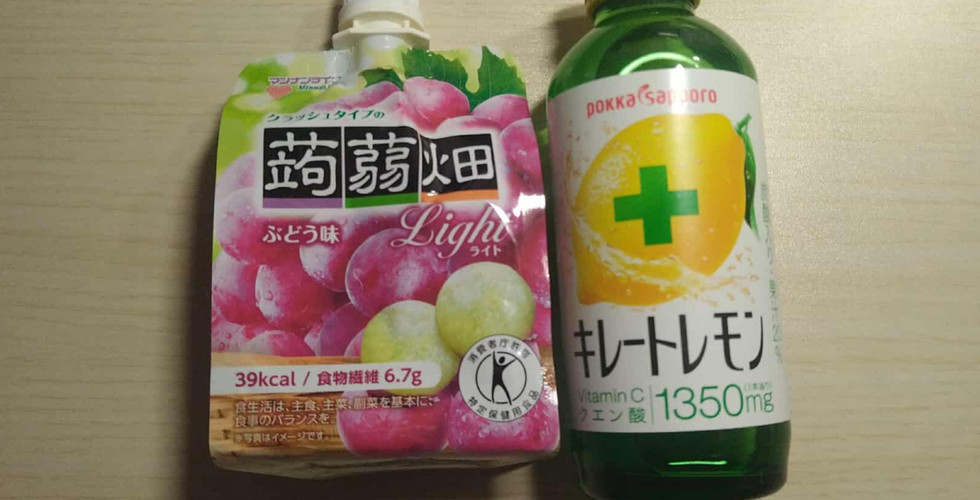
Ingredient (I used): Kireto lemon + Konyaku jellygrape + Ice cup

This one was super easy to put together. Just pour both ingredients into the ice cup (or any cup of ice, like I used), give it a good mix with a straw or clean chopstick, and voilà—you’ve got your drink!
I’d seen a few comments saying this drink was too sour, so I was a little nervous that I wouldn’t enjoy it. But after one sip, I was honestly surprised because it was really delicious! Yes, it’s sour, but not overwhelmingly so, at least for me. Of course, everyone’s taste buds are different. Compared to the matcha float drink I tried, this one is something I could happily drink every day…though I probably shouldn’t, or I’ll end up with diarrhea every day too. But seriously, it tastes so good.
Summary:
Appearance: Looks like a sparkling drink or a mock mojito.
Texture (Taste): Sour with a hint of sweetness; the jelly adds a soft, delicate texture.
Difficulty: Very easy, though squeezing the jelly out can feel a little bothersome.
Overall Rating: ★★★★★
Yakult Smoothie
Ingredient (I used): Y1000 Yakult + any 7/11 Smoothie

To turn your cup drink into a smoothie, make sure to prepare it inside the convenience store, since they have a machine specifically for that. All you need to do is scan the barcode on the lid, peel the cover off, and place the cup inside the machine. Once it finishes blending, pour in the Yakult, pop the lid back on, and insert a straw, and that’s it! Your drink is ready.
I tried the strawberry flavor, and while it tasted good, it wasn’t anything mind-blowing. It’s pretty much like any regular drink you’d find. Would I buy it every time? Probably not. Would I buy it again just for fun? Sure! It’s refreshing, it quenches your thirst, and the Yakult makes the cup feel satisfyingly full.
Summary:
Taste: Pretty standard.
Texture: Smoothie-like (as expected).
Difficulty: Super easy to prepare, thanks to the machine.
Overall Rating: ★★★★☆
Matcha Float
Ingredient (I used): Matcha drink + Coolish Vanilla + Ice Cup

First, you’ll need to wait for the ice cream to soften. You can speed this up by gently squeezing the pouch with your hands until the ice cream feels smooth and easy to press out. While waiting, pour the matcha into your ice cup, then squeeze the softened ice cream on top. Use a straw or a clean chopstick to mix everything together carefully so it doesn’t spill.
For me, getting the ice cream into the cup was a struggle because it was very cold (obviously), and I didn’t wait long enough for it to melt. But after a few seconds of warming it with my hands, it finally became soft enough to squeeze out smoothly.
The drink tasted more like vanilla at first, even after mixing well, which makes sense considering how much ice cream is used. As I kept drinking, the matcha flavor slowly started to come through, but overall, I still wasn’t satisfied. I’ve never been a big fan of Coke floats, and this reminded me so much of one, so the taste wasn’t for me. But if you do enjoy Coke floats or creamy, dessert-like drinks, you might actually love this!
Summary:
Appearance: Soft, pastel green matcha at the bottom with a swirl of vanilla ice cream on top.
Texture: The matcha base is silky and slightly thick, while the melted ice cream adds a rich, velvety creaminess.
Difficulty: Not too difficult, but can be a bit tedious if the ice cream isn’t softened enough to squeeze.
Overall Rating: ★★★☆☆
DESSERT
Pudding Toast
Ingredient (I used): Pudding + One slice of toasted white bread

With the bread freshly toasted and the pudding spread on top, the whole thing looked… questionable. The pudding I bought was pretty big, so I only used half, but immediately the temperature difference threw me off because cold pudding on warm toast just felt wrong.
And when I took a bite? It was honestly disgusting. The bread turned soggy almost instantly, and the silky sweetness of the pudding did not blend well with the toast at all, which surprised me, because I went into this expecting a Nutella-on-bread type of vibe, just with pudding. Instead, the bread tasted and even felt like cardboard, and I promise I’m not exaggerating. The only good part was the pudding by itself; it was actually delicious on its own.
Summary
Taste: Sweet pudding, but the bread tasted like cardboard.
Texture: Crusty toast mixed with slippery, silky pudding.
Difficulty: Super easy—unless you don't know how to toast a slice of bread or follow basic instructions.
Overall Rating: ☆☆☆☆☆ (yes, zero.)
Royal Coffee Milk Tea
Ingredient (I used): Frozen Royal Milk Tea + Hot Milk + Coffee Jelly

Before opening anything, start by preparing your cup of milk (about 50 ml), then pop it in the microwave to heat it. Then, pour it into the royal milk tea cup and give it a quick stir using a straw or a clean chopstick. Once it’s warmed and mixed, add in your coffee jelly.
The brand I bought wasn’t exactly the one used in the reference video, so the jelly pieces were smaller than expected. Though it was still good, it was not quite the same. But, the drink tasted exactly like you’d imagine: classic royal milk tea with a gentle hint of coffee. The balance between the two was spot-on, and the sweetness was just right. It had a nice thickness and creaminess—rich, but still smooth enough to sip through a straw.
Overall, I really enjoyed this one. Honestly, I ended up enjoying this even more than the matcha float… and that says a lot, because I’m a matcha person.
Summary
Taste: Classic royal milk tea with a touch of coffee; perfectly balanced sweetness.
Texture: Thick and creamy, yet surprisingly refreshing.
Difficulty: You only need a microwave to heat the milk (that’s the longest part of the prep), then put the ingredients together in one cup. Simple!
Overall Rating: ★★★★★
The Abomination Hack
Ingredient (I used): Curry Cup Ramen + Mochi Vanilla Ice-cream (comes in two, but needs just one).

Prepare your ramen, and once the noodles soften, take out just one mochi ice cream by gently pushing it from the bottom. I saved this one for last, not because I was saving the best for last, but because I’d been dreading this combination. A savory dish and a sweet dessert are great on their own, but mixing them together felt…illegal.
After I stirred the ice cream into the ramen, the appearance immediately turned me off. What was once a delicious curry broth transformed into something like a curry shake, and the texture looked slimy—almost natto-like. I hated how it looked.
And just as I expected, my first bite was goddamn awful. The curry spices hit first, but then this soft hint of vanilla followed right after, which made it even weirder and it made me want to puke.
HOWEVER, I did not want to waste it and as I kept taking bite after bite, the vanilla gradually disappeared. Thankfully, all I could taste was curry, which made the dish easier to chew and swallow. And honestly… it wasn’t bad. For the final step, I cleansed my palate from the spice by eating the last bit of the mochi ice cream on its own, and that was absolutely delicious.
Summary:
Taste: Savory with an initial hint of sweetness in the first few bites. Once the sweetness fades, the curry spice takes over, making it much easier to eat.
Texture: The broth is slimy at first but eventually settles back into a thick, curry-coated consistency around the noodles.
Difficulty: Extremely easy; done in a blink.
Overall Rating: ★☆☆☆☆
Final Thoughts
After trying every single hack on this list, I’ve got to say, I actually enjoyed the entire journey, even though a few items were…let’s just say very questionable. So for this conclusion, I’ve narrowed everything down to my top 4 delicious hacks and my top 4 “never again” hacks, one from each category.
My Top 4 Delicious Hacks:


Egg and Chicken Sandwich : Egg Sandwich + Famichiki (or Chicken Red for spice)
Meal 1 : Rice + Soft-boiled Egg + Seasoned Stewed Pork + Kimchi
Digestion Drink : Kireto Lemon + Konyaku Jelly Grape +Ice Cup
Royal Coffee Milk Tea : Frozen Royal Tea + Hot Milk + Coffee Jelly
My Top 4 Never Again Hacks:


Eggs Cookie Mochi : Ball Cake Milk + Milk
Meal 2 : Big Tonkotsu Cup Noodle + Poached Egg + Raw Pork
Matcha Float : Matcha Drink + Coolish Vanilla + Ice Cup
Pudding Toast : Pudding + A slice of Toast
Maybe with these picks, you can try them out yourself when you visit Japan, whether it’s for the experience, for fun, or simply to satisfy your curiosity!
